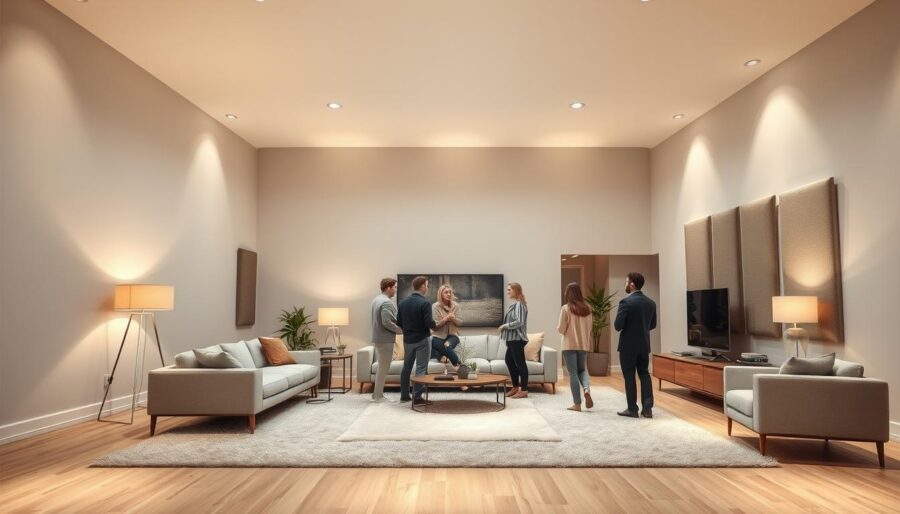
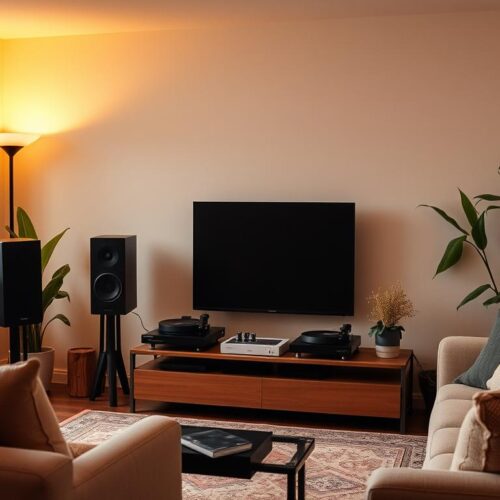
When large volumes and hard finishes meet, speech clarity can fall fast and stress can rise. You’ll learn why reflections create echo and how simple changes cut reverberation so your sound is clearer and calmer. This guide even covers how echoes in open spaces build up and what to do first.
Start with soft, porous materials like rugs and upholstery and consider targeted panels to tame long reflection paths. Good layout moves and a few plants also change how a room behaves. These fixes improve acoustics and reduce common noise problems without a full remodel.
Expect a step‑by‑step plan that fits your budget and lifestyle. You’ll get quick wins you can apply today and guidance on when to invest for measurable results over time. Use these tips to make your living areas feel more intimate while keeping the bright layout you love.
Understand why open concepts echo: sound waves, hard surfaces, and high ceilings
Wide, uncluttered rooms let sound travel farther before it hits a hard surface. That extra distance makes delayed reflections more likely, so speech can smear and the room feels louder.
Hard surfaces such as drywall, glass, wood, tile, or concrete act like mirrors for sound. Each wall, floor, and ceiling returns part of the energy as another reflection. When reflections stack, they form a lingering tail that reduces clarity.
How porous absorption helps: Soft, fibrous materials let pressure fluctuations enter their structure. Viscous friction inside fibers converts sound energy into heat, shortening the decay of the tail and improving intelligibility.
- You get more echo because sound waves travel long paths and then bounce off hard surfaces.
- High ceilings extend those paths, so reflections return later and smear words.
- Target early reflection points—small soft additions there make speech noticeably clearer.
- Pair materials with different absorption profiles for even performance across frequencies.
Assess your space today: quick tests and what to look for
You can learn a lot about your room with a couple of simple, hands-on checks. Start by clapping once from your usual seating area and listen. If the clap rings or “twangs,” the decay time is long and the RT60 needs to fall for clearer speech.
Walk around and speak from several positions. If your voice sounds boomy or smeared at normal distances, early reflections are overwhelming direct sound. Note large uninterrupted wall runs, exposed ceilings, and hard floors—these surfaces drive most reverb and dominate where sound energy builds.
- Clap test: a long ring signals you need more absorption at key reflection points.
- First reflections: imagine straight lines from mouth level to nearby walls and ceilings; those are prime treatment spots.
- Frequency clues: sibilant harshness means highs; boxy or boomy tones point to midrange or low problems—mid frequencies (500–2000 Hz) matter most for speech.
| Check | What it reveals | Next step |
|---|---|---|
| Clap decay | Long RT60 | Add mid-frequency absorption near reflections |
| Walk-and-speak | Boomy or smeared voice | Treat first reflection points and redistribute furniture |
| Document items | Existing absorbers and noise sources | Sketch layout and plan even coverage |
Record a short clip now and again after changes. Tracking baseline and results helps you measure how much time the lingering tail falls and whether your design choices worked across your rooms.
Fast, low-cost fixes to reduce echo on day one
You don’t need a remodel to hear big improvements; simple material swaps work today. Roll out dense area rugs in the hardest floor zones first — target seating and walking paths where reflections are strongest.

Choose thick, textured textiles. Favor wool, cotton, silk, or hemp and consider long‑pile rugs for extra absorption. Heavy drapes on wide windows tame early reflections and lower outside noise while giving you light control.
- Add upholstered seating and fabric‑backed chairs to cluster conversations and absorb sound at mouth‑height.
- Layer throws, cushions, and fabric wall decor so multiple porous furnishings work together across mid and high frequencies.
- Break long sightlines with bookcases or open shelving to interrupt wave paths and add soft contents.
- Place runners under dining tables and use door sweeps or soft pads under furniture to cut clatter and vibration.
- Angle standing mirrors or art slightly to avoid perfect parallel reflections while you plan permanent treatments.
These material‑forward ways quickly reduce echo and make your living areas feel warmer and more comfortable without changing your layout. Expect a measurable drop in reverberation from these simple, affordable moves.
Invest in acoustic panels for targeted sound absorption
Acoustic panels give you a reliable way to tame reflections and lift speech clarity where rugs and furniture fall short.
How they work: These porous panels let waves enter a fiber network, where tiny friction converts some sound energy into heat. That conversion shortens the decay time and improves clarity without making a room feel dead.
Choose tested products. Look for published NRC ratings (typical range 0.30–0.95) and consider thickness, since thicker constructions absorb lower speech frequencies better.
- Professional options like Eurospan Stretch Systems, Respond A Series, and New Dimension tiles match performance to your design goals.
- Plan coverage across multiple reflection points on walls and ceilings rather than relying on a single panel.
- Mix sizes and fabric‑wrapped finishes or printable faces to blend treatment with decor.
| Factor | Why it matters | Action |
|---|---|---|
| NRC | Average absorption across speech band | Pick rated products |
| Thickness | Low‑frequency performance | Use thicker panels where bass is present |
| Placement | Targets early reflections | Mount at ear height near seating |
Practical tips: Combine panels with rugs and upholstery for balanced treatment. Mount panels on rails or French cleats so you can tweak placement as you listen. Remember: panels improve what you hear inside the room; they do not replace structural isolation for external noise.
Acoustic solutions for vaulted ceilings and tall rooms
You face a vertical problem when your ceilings rise: sound waves travel up, reflect from the peak, and return delayed. Treating the overhead plane stops those long trips and helps speech sound clearer.
Use acoustic clouds and baffles. Clouds hung horizontally capture vertical energy. Vertical baffles work best where lateral waves bounce between long walls. Combine both for full coverage.
- Place treatments above seating, dining, and work areas for the biggest gain.
- Introduce wood beams or slatted grids to break specular reflections and warm the look.
- Pair ceiling panels with wall panels to balance decay across the room.
| Solution | Best for | Effect on sound |
|---|---|---|
| Acoustic clouds | High peaked ceilings | Captures vertical reflections, reduce echo |
| Vertical baffles | Long narrow rooms | Intercept lateral waves, improve clarity |
| Wood beam grids | Architectural finishes | Scatters reflections and adds warmth |
| Paired panels | Conversation zones | Stabilizes decay across frequencies |
Practical note: Keep clearance for lights and sprinklers and stagger elements so you catch multiple paths without cluttering the area. After installation, repeat a clap or speech test to confirm you have reduced echo and improved intelligibility.
Optimize furniture layout and room design to improve acoustics
A few placement tweaks to sofas and shelves can transform how sound moves across a living area. Move key seating off the walls so furniture interrupts waves rather than reinforcing long reflections.
Zone the floorplan into conversation clusters. Anchor each cluster with a rug and place upholstered seats inside that zone so absorption happens where voices start and are heard.

- Use bookcases with varied contents to scatter and soften reflections while keeping walkways clear.
- Hang one or two panels at first reflection points near seating for precise gains without covering entire walls.
- Offset symmetrical layouts and angle mirrors slightly to break flutter between parallel surfaces.
Taller elements such as plants or open screens gently subdivide the space and preserve daylight and sightlines. Test changes one item at a time and listen: clearer speech and lower perceived noise tell you the design is working.
| Layout move | Acoustic effect | Action |
|---|---|---|
| Pull seating off walls | Interrupts long reflection paths | Place sofas 6–12 inches from walls |
| Anchor with rugs | Localizes absorption near talkers | Use dense, textured rugs under seating |
| Bookshelves & screens | Scatter and partly absorb reflections | Fill shelves with mixed items; keep routes clear |
Bring in plants and diffusion for a natural acoustic boost
Natural greenery and textured decor can quietly change how sound behaves around you.
Use tall plants near reflection points to absorb sound and scatter early arrivals before they hit hard surfaces. Cluster planters at staggered heights to create layered depth that works like small diffusers.
Mix natural materials such as wool throws, cork decor, and woven baskets to add porous materials and more surface area for absorption. Pair plants with decorative diffusers or sculptural elements where you cannot add panels.
- Position greenery at ear height near seating to intercept direct paths rather than tucking everything into corners.
- Choose acoustic artworks that combine fabric-wrapped absorption with visual appeal for living areas.
- Expect gradual gains: plants and diffusion help most when layered with rugs, furniture, and panels.
| Element | Role | Effect |
|---|---|---|
| Plants | Absorb and scatter energy | Lower reflections, soften waves |
| Natural materials | Porous surfaces | Help absorb sound across mid/high bands |
| Diffusers/art | Break strong paths | Reduce focused reflections without deadening |
Sound absorption vs. soundproofing: set the right expectations
Know the difference: treating room sound and blocking noise are two separate goals that need different solutions. Sound absorption improves what you hear by converting part of the wave’s energy to heat inside porous materials.
That microscopic friction lowers reverberation and reduces echo, which eases listening fatigue. Panels and textiles shape the sound inside rooms and raise clarity, but they do not stop transmission through walls.
Soundproofing fights transmission loss. It uses mass, airtight seals, and decoupling to prevent sound from crossing assemblies. If you have loud neighbors or traffic, you will need sealed, heavy constructions for real reduction.
- Match the fix to the problem: use absorption for interior comfort and mass/air seals for isolation.
- Plan enough coverage and correct placement—too few panels give limited change.
- Combine absorption with diffusion, furniture, and door seals for balanced results in an office or living room.
| Goal | Best approach | Limitations |
|---|---|---|
| Improve clarity | Panels, rugs, textiles | Won’t stop heavy transmission |
| Reduce transmission | Mass, seals, decoupling | Costly and invasive |
| Mixed needs | Layered absorption + modest seals | Moderate gains, not full isolation |
Measure before and after with recordings so your expectations match what absorption and isolation actually achieve.
Conclusion
Targeted changes give big returns: pair textiles and rugs with focused panels to tame echo and restore clear sound. Start by treating the largest hard surfaces, then add rugs and upholstered seating where people talk.
Distribute absorption across walls and some ceiling areas to shorten decay from all directions. Use acoustic panels with published NRC data and choose materials that absorb sound while matching your design.
For tall rooms, add overhead clouds or wood grids to catch reflected sound waves that wall treatments miss. Work in stages: day‑one textiles, then panels, then layout tweaks as you listen over time.
Measure results: repeat simple tests and recordings. When conversations feel easier and noise drains faster, your acoustics plan is working and your home will sound as good as it looks.

